Tuesday, November 29, 2011

Skinny Dip Soaps GIVEAWAY!

This Giveaway is now closed!

Here is a little Soap Sample that I got in a Handmade Sampler Box that I bought in October. This little guy is So Cute that I didn't want to use it. But I eventually did. He smells so yummy and leaves my skin really soft! I love handmade soap!
So I decided to check out this Etsy Shop...
They have lovely bath bombs, lip balms, soy tart wax melts, sugar scrubs, and so much more!!

Well I contacted Amber who is the owner and maker of Skinny Dip Soaps and asked if she would do a giveaway to our lovely followers. We ALL LOVE FREE Things, especially for Christmas!

But before we get to the giveaway, I asked her a few personal questions about herself. So lets get to know Amber at Skinny Dip Soaps!...


Favorite Hobbies: Anything that has to do with crafting or baking :)

What Inspires me? My children. They have very sensative skin and are the reason I started making soap.

Favorite Holiday Tradition: Decorating the Tree with my family the day after Thanksgiving. Every year each person picks out a new ornament so the kids are pretty excited to hang them up.

Personal favorite item to make and use: Sugar Scrubs! They smells yummy and leave my skin so smooth!

Favorite Quote: The best way to cheer yourself up is to try to cheer somebody else up. ~Mark Twain

Now on to the Giveaway!...
She is going to giveaway to One Lucky Winner a

Dead Sea Mud Set.

It includes a bar of Dead Sea Mud Soap (4.5 oz),
Dead Sea Mud Salt Scrub (4 oz.),
and a Face Mask Sampler.

It's a $25 value!


Ways to ENTER (7 ways to Win!):
Leave Us a comment below for each entry!

1. Go to the Skinny Dip Soaps Shop and leave a comment telling us which is your favorite product.
2. Add their shop to your Favorites on Etsy!
4. Leave them a comment on their Facebook Page telling them Babblings & More Sent you.
5. Follow Babblings & More blog! We love new friends!
7. Share this Giveaway on your Facebook Page!


This giveaway will end on December 7th at Midnight.
Skinny Dip Soaps is offering a 20% Off Coupon Code!
Enter SKINNYDIP20 at checkout!

Monday, November 28, 2011

Nativity Block

A couple years ago, our Relief Society made these Nativity Blocks.  Since then, it has been one of my favorite Christmas decorations and they were super easy to make. 
You can get the glass blocks at Hobby Lobby and one of my friends cut out the vinyl of the Nativity Scene.  The glass block has a hole at the bottom of it where I put the Christmas Lights and some ribbon inside.  Then I just tied a bow around the block and was done!  
Super easy and cute!!

Vote for us daily!

Minky Couture Giveaway Winner

Minky Couture Blanket Giveaway 
 
63 

63. The Bullock Family said...
I liked your facebook.
  Powered by RANDOM.ORG

Bullock Family -  Please send your email to us within 48 hours. 
We will then send your information to Minky Couture and they will contact you. 
If we do not hear from you, we will pick another winner. 
Thank you so much! 

Friday, November 25, 2011

Minky Couture Giveaway

Due to the Holiday Weekend, we have decided to keep our Minky Couture Giveaway open until Sunday.  We will notify the winner on Monday!  Good Luck!! 
We hope that everyone has had a great Thanksgiving! 

Wednesday, November 23, 2011

Bathroom Makeover

 Just a Reminder- Come enter into our Minky Couture Blanket!

Our parents just remodeled their bathroom recently.  I think it turned out SUPER cute.  I wish we could have took some before pictures (because let me tell ya- there is a HUGE improvement!)  
Here are some pictures...


Our dad is a Blacksmith, so he made the wonderful towel rack, toilet paper holder and brackets.


This towel rack is made from old horseshoes.


Dad made a barbwire/horseshoe toilet paper holder. ADORABLE!

For the Shower they used galvanized tin.  It looks awesome!!
If you would like to see more of the great blacksmith stuff our dad makes visit his blog HERE.

Tuesday, November 22, 2011

CTR Blocks

I made these CTR Blocks a couple weeks ago and they were SUPER easy.  My children love to play with them and they stand for Choose The Right!  A win/win if you ask me. Here they are...
What you need:
4in x 4in blocks
Scrap Book Paper (cut 3in x 3 in)
Vinyl Letters 
Mod Podge 
Spray Paint
Sand Paper
Directions:
1. Spray Paint the blocks- (it does not need to be very thick because you are going to sand it down.)
2. Sand down the edges of the blocks.
3. Mod Podge the Scrap Book Paper onto the blocks.  A tutorial on how to Mod Podge can be found HERE.
4. Put the Vinyl Letter on the Paper.
You are DONE! 


Monday, November 21, 2011

Christmas Planner

Every year I keep a master list of Christmas presents.  I have to or else I will forget something or someone!  I just can't remember everything now a days. :)

So I came across this really cute idea for a Christmas planner from the Sisters at Eighteen25 and I knew that I had to make my own.  You can head over to their blog and check the printables for the planner and the full instructions.  I did a few adjustments as I made mine.

I used a notebook that I picked up on clearance somewhere.  It's about 6 x 7 inches.  I covered the front with Christmas paper.  I tied the ribbons on the wire rings on the side.  I did this only to cover up the purple background of the notebook that I couldn't put paper on.  If you look closely, you can see the purple under the ribbons. 


On the first sheet, I covered it with more paper and glued on a fancy envelope that I cut out using my Silhouette machine.  This is where my coupons go.


The second page has another envelope for the receipts.


Here's the tab that will take you to the master list.  No one is allowed to look here except me!  :)


As you can see, I glued Christmas paper onto the page that I attached the tab onto.  I just wanted to reinforce that page. 


Here is my calender.  You can find the printable on Eighteen25's blog.


And here is my To Do tab.  I will put my different ideas down, recipes, lists, etc.


And last, but not least, I covered the back of the book as well!  This was such a cheap project because I had everything lying around!


Now for the fun part!  Shopping...

Thursday, November 17, 2011

Dresser Mirror Barrette Holder

My two little girls have a whole lot of flowers and bows!  (I went a little crazy after having 5 boys first!)  I didn't have the time to make one of those fancy bow holders, although I would think about it all the time.  I previously kept them in a box that I kept inside their dresser drawer, but they kept falling out and it was so disorganized and messy!

When we moved a few months ago, one of my older boys came up with this idea and it has worked great!  He took a long ribbon, about 1 to 1.5 inches thick, and pinned it to the back of the mirror.  Then draped it along the front of the mirror and pinned the ribbon to the bottom of the mirror. 


So simple and easy!  And now we just clip the barrettes to the ribbon and call it good!  We have two ribbons down both sides of the large mirror on the dresser.  My daughters love to pick out what flower or bow they are going to wear that day!  Usually I have to encourage a "matching" one to go with their clothes...

Wednesday, November 16, 2011

Minky Couture Review and GIVEAWAY- CLOSED

I don't know about you, but I absolutely LOVE soft and cuddly blankets.  I also love it when I can cuddle with my children in them.  I recently received a blanket from Minky Couture and I absolutely LOVE it!  I decided to get one for my little girl and was completely impressed with how many options Minky Couture has!  I chose the Collette fabric.  Here it is with my sweet daughter!

 We have had this blanket for about a month and she absolutely ADORES it!  This blanket has held up really great too.  We live in Texas and recently went on a road trip to Arizona.  This blanket has been drug around in dirt, has had food on it and has been everywhere a little 18 month old goes.  We have washed it several times and it still looks and feels brand new!  I have been REALLY impressed!
Here are some of Minky Couture blankets that I love...

Paris: Brown and Cream Blanket


Bridger: Red and Brown Cowboy
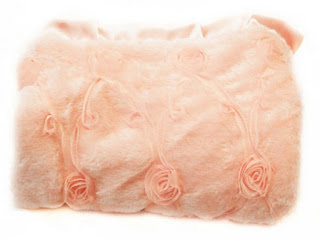
Audrey: Light Pink with a Rosebud Chiffon Stitch
Now on to the GIVEAWAY!
Minky Couture is going to give one of our readers an Infant Size Blanket (Valued at $65)

Ways to ENTER (4 ways to win!):
1. Go to Minky Couture Website and leave a comment telling us which is your favorite blanket.
2. Like Minky Couture on Facebook. Leave a comment telling us you did.
3.  Follow Babblings and More blog!  We love new friends!  Make sure you leave a comment.
4.  Like Babblings and More Facebook page.  Leave another comment.

Minky Couture is also offering a discount code to our readers for 35% off their website prices! 
The code is- Minky2011bs
  
This giveaway will end on November 23rd at Midnight. 


Tuesday, November 15, 2011

DVD Personal Labels


Do you have a bunch of Free Address Labels laying around the house? Well here is a great way to use them up...


We put them on our DVD Cases, usually above the barcode. That way if you have the neighborhood kids that borrow a movie from you they remember exactly who it belongs to.
Happy labeling!


Monday, November 14, 2011

Peanut Butter Rice Krispie Treats

We just celebrated my son's 8th birthday.  He didn't want a cake this year...he wanted peanut butter rice krispie treats!  I was glad to have that request!  Quick and easy and very tasty!


Peanut Butter Rice Krispie Treats

2 cups Corn Syrup
2 cups sugar
2 cups peanut butter
7 cups Rice Krispies
Heat corn syrup and sugar almost to a boil.  Then add the peanut butter.  Mix.   Add the rice krispie cereal.  Spray a 9 x 13 inch pan and add mixture.

Chocolate Topping

1 cup milk chocolate chips
1 cup semi-sweet chocolate chips
1 cup butterscotch chips

Put in a microwave safe container.  Microwave in 30 second intervals, stirring between each interval until melted.  Then spread over the rice krispies in the pan.  Let the chocolate harder and then enjoy!
Sometimes I put the pan in the freezer for a little bit to help the chocolate harder quicker, but don't forget about it!


Thursday, November 10, 2011

Tutu Bed Skirt


I remember talking to one of my friends about bed skirts and she mentioned using tulle and making a ballerina bed skirt.  So I decided to give it a try!  

I used an old bed skirt that I had already, but didn't use, and cut the skirt part off so I just had the rectangle part.  I bought a couple yards of pink tulle and cut it into strips the length of the end of the mattress to the floor plus an inch or two.  I wanted it to drag on the floor a little.

Then I gathered the tulle and sewed it onto the rectangle piece.  I actually did two layers of tulle on each side to give it a more fuller look!


Just a word of caution:  Don't get the vacuum too close to the bed skirt!  My vacuum likes to suck up the tulle like it's going out of style!


I bought the crib sheet on clearance at Target.  It is actually a "boy" crib sheet, but it matched perfectly with my other daughter's bedding (also from Target).


Vote for us daily!

Wednesday, November 9, 2011

Did you know?...

~There are two little tricks you can use to see if you look best in warm or cool colors. You can look at the inside of your wrist and if your veins appear blue you are a "cool", if your veins appear green you are considered "warm". You can also hold something gold and something silver up to your skin, if the gold compliments your skin you are a warm and if the silver compliments you then you are a cool. This is not a strict rule, just a general guideline to help you find the right shade.

Tuesday, November 8, 2011

Mesa Arizona Temple Picture on Canvas

I just had to jump on the band wagon and show you all the picture that I mod podged of the Mesa Arizona Temple.  

I got my picture from Mindy Evans Photography.  She has pictures of various temples in various sizes that you can download for free!  They are all so beautiful!

I put my picture on a canvas that I had laying around.  Before I attached the picture, I painted the sides of the canvas black.  Then I mod podged the picture.  I deliberately left brush strokes on the picture because I liked the texture.

For more detailed instructions, see Bridget's and Brooke's post.
Click here to see the picture Bridget did of the Snowflake Arizona Temple.
And click here for the temple Brooke did of the Salt Lake Temple and Lubbock Texas Temple.

Monday, November 7, 2011

Welcome to the Sisterhood!

One of our brothers got married to a fantastic girl this past week!  We all love Karlee and we are so glad that she is apart of our family!  The wedding was beautiful and the reception was a whole lot of fun!  My boys kept saying it was their favorite reception of all time!

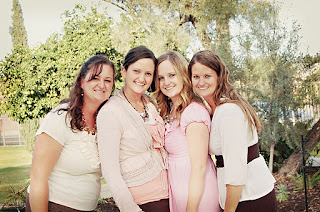
Here is a picture of all us girls with Karlee.  Isn't she so beautiful?  She married our brother John.  Larissa (on the left) married our brother James and is expecting their 2nd child in a few months!  We are so glad that these two wonderful ladies are apart of our family!  They add so much to our family!

 
Larissa, Brittany, Brooke, Karlee, Briana, and Bridget
Since we were all down for the wedding, we decided to snap a few pictures.  My son, Caleb, took these pictures.  He's becoming quite the photographer!
Bridget, Briana, Brooke, and Brittany
Hope you all had a wonderful weekend!

Friday, November 4, 2011

Halloween Candy Surprise!

Look close! Do you notice something different about the Halloween Candy?
Someone gave my little Trick-or-Treaters Toothpaste! Ha, Ha!
We had a good laugh at that one!...
Great idea though.

Thursday, November 3, 2011

Pumpkin Brains


This is a dish that we would always have for Halloween. It is so yummy and make sure you scrape the side of the pumpkin to get the yummy meat of pumpkin that tastes great with the rice. This is what is looks like before it is cooked...

Here it is cooked. It may fall more depending how long you bake it.
Heres the rice "stuffing".

Pumpkin Brains

1 Med. Pumpkin (clean all seeds out)
3 c. Cooked Rice-
(Al dente. Don't over cook the rice cause it will cook more inside the pumpkin)
1 lbs. Hambuger or Sausage (cooked)
1 Carrot (shredded)
1 Celery (chopped)
1 Small Onion (chopped)
2 cans Cream of Mushroom

1 c. Sour Cream


Cook the rice and fry the hambuger/sasuage and drain the grease. Sautee the carrots, cellery, and onions. In a large bowl, combine all the ingredients together, including the cream of mushroom and sour cream. Scoop the rice mixture into the pumpkin and place the pumpkin lid back on top.
Put pumpkin on a cookie sheet so that you can move it.
Bake at 400' for 45-60 min.
This will feed a crowd, so make sure you have your friends or family over to eat!
Related Posts Plugin for WordPress, Blogger...